This web page is a part of buffi's web ring
Categories
Shmups Old Hardware Retro Computers

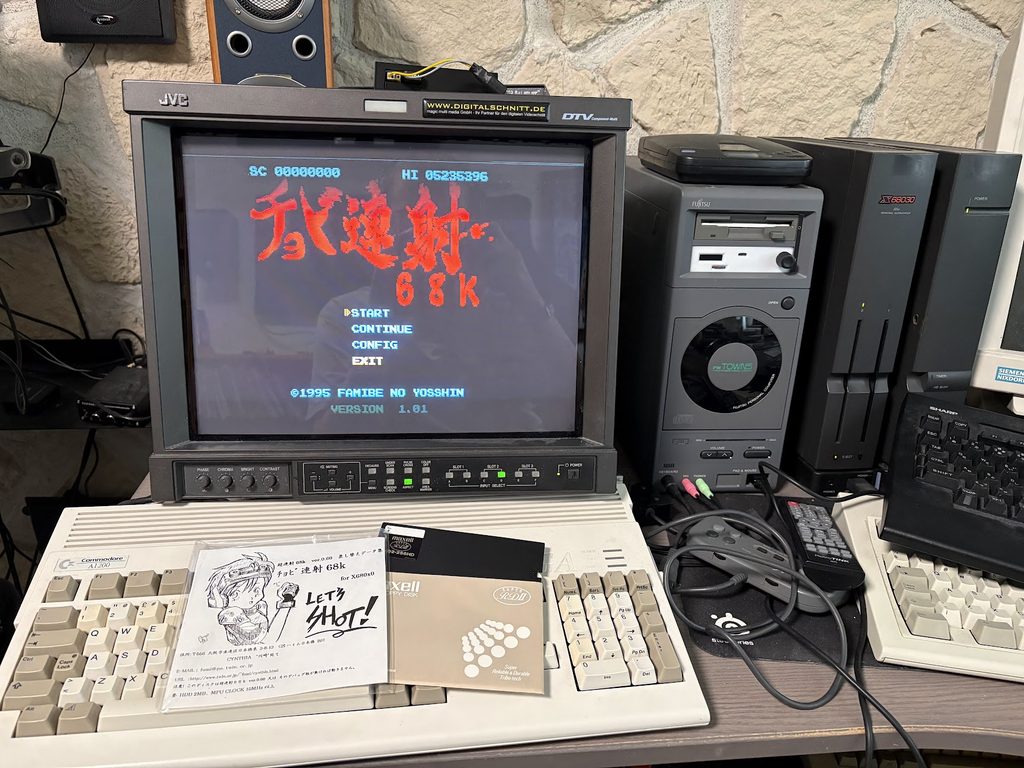
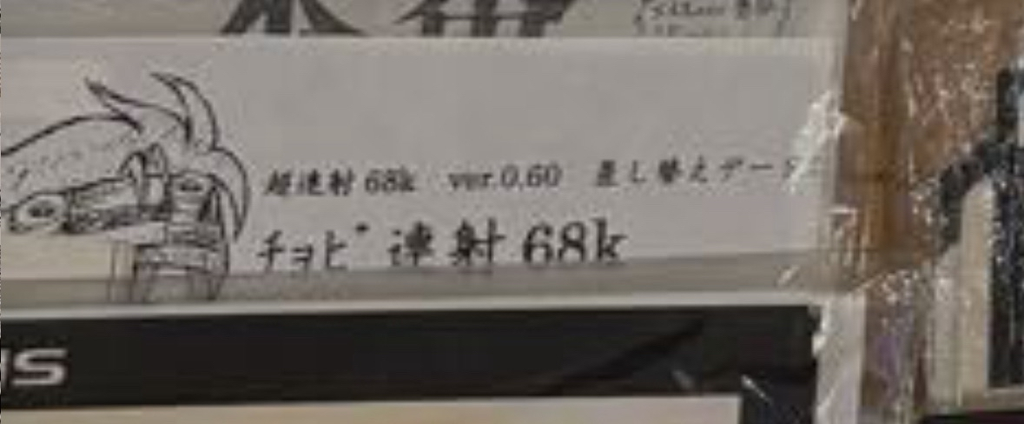
I dumped Chobi Ren Sha 68k

This is going to be a slightly long post, so the TL;DR is the following:

What is this thing?

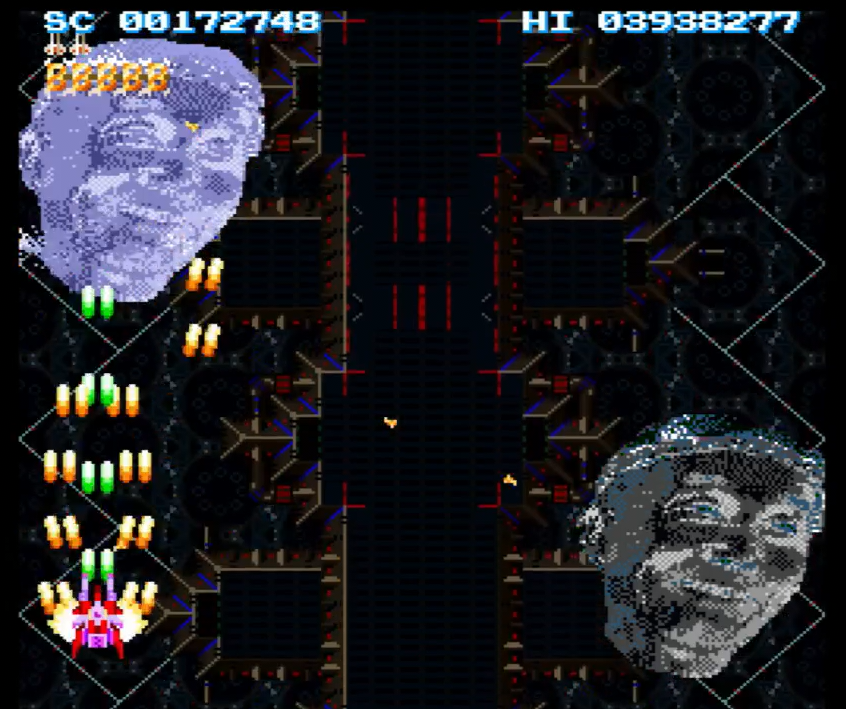
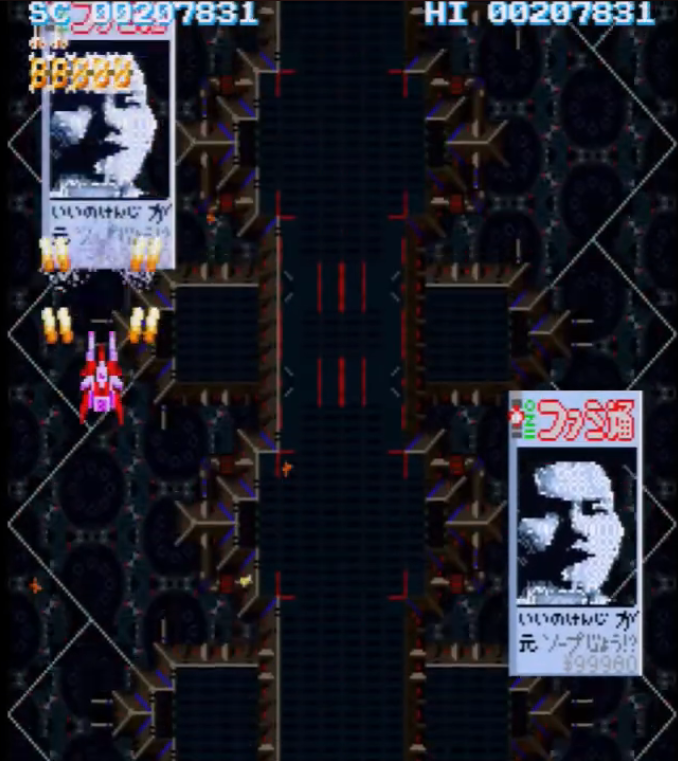
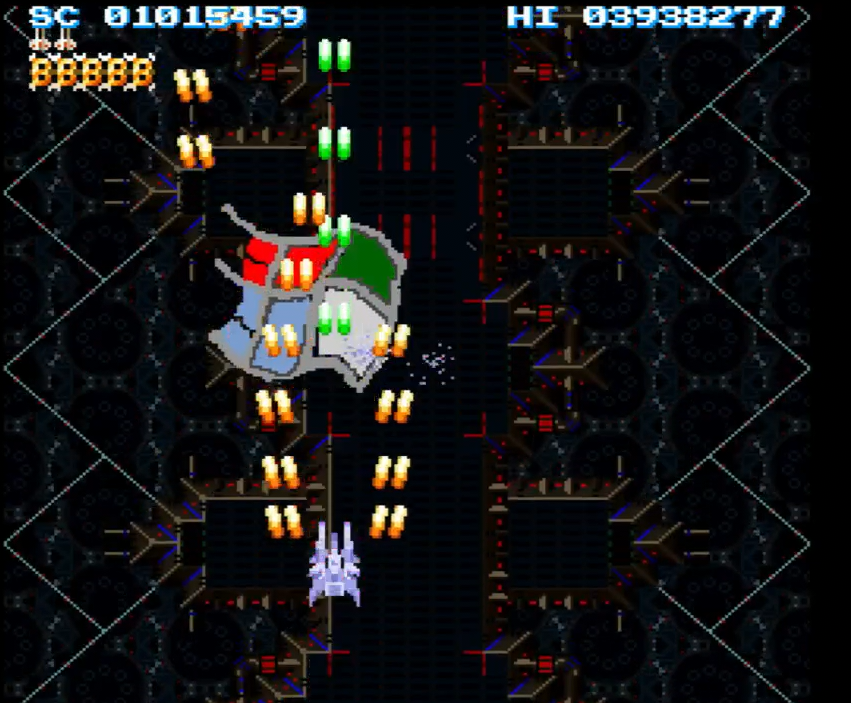
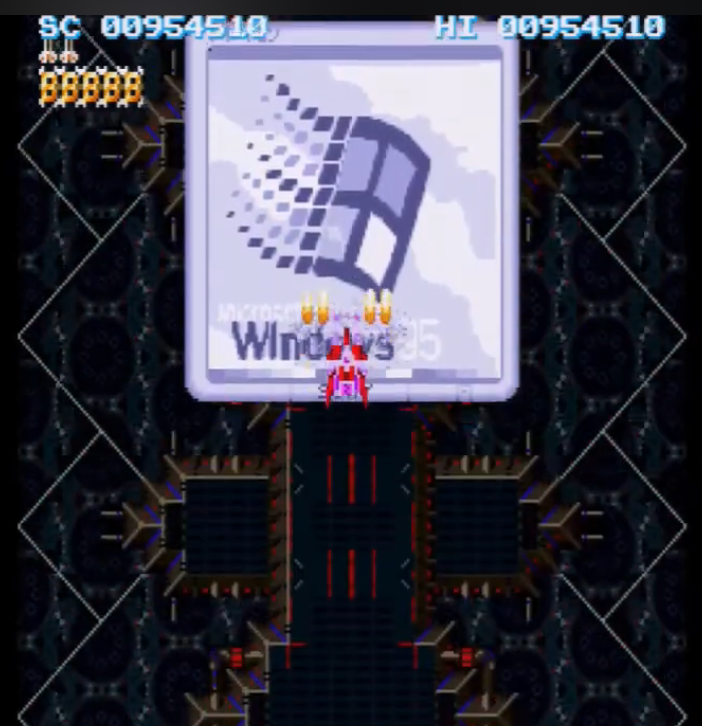
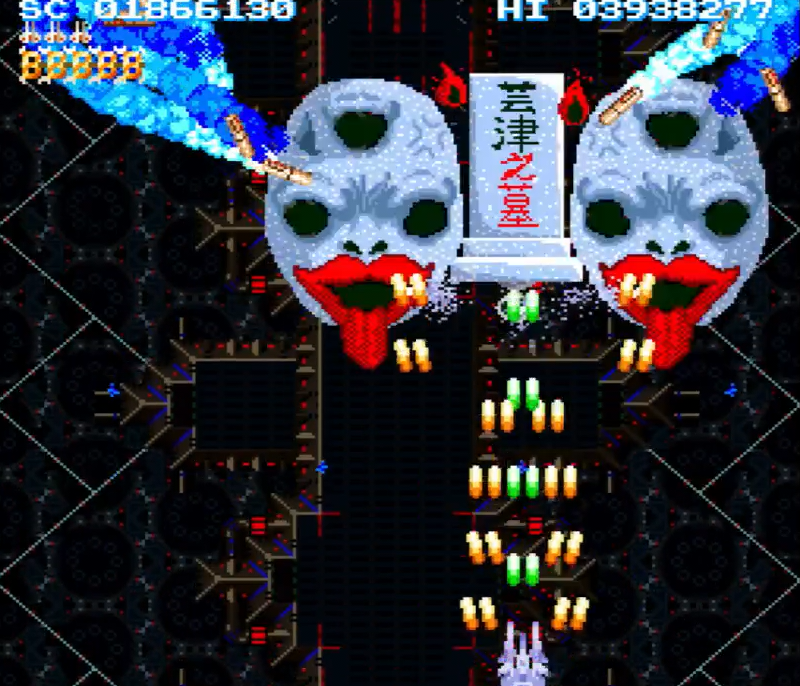
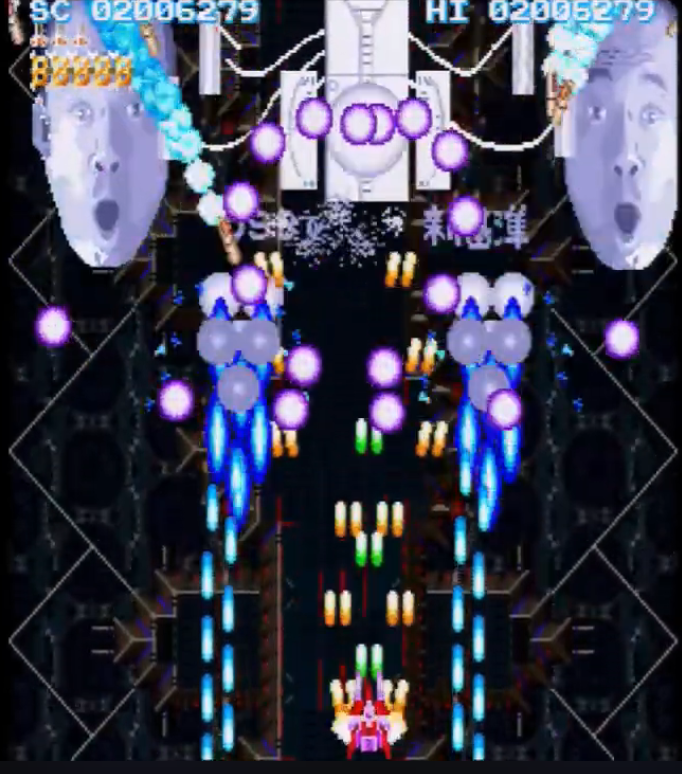
Chobi Ren Sha 68k is a conversion of Cho Ren Sha, which swaps out sound effects, boss sprites and music to other assets. Gameplay is unchanged.

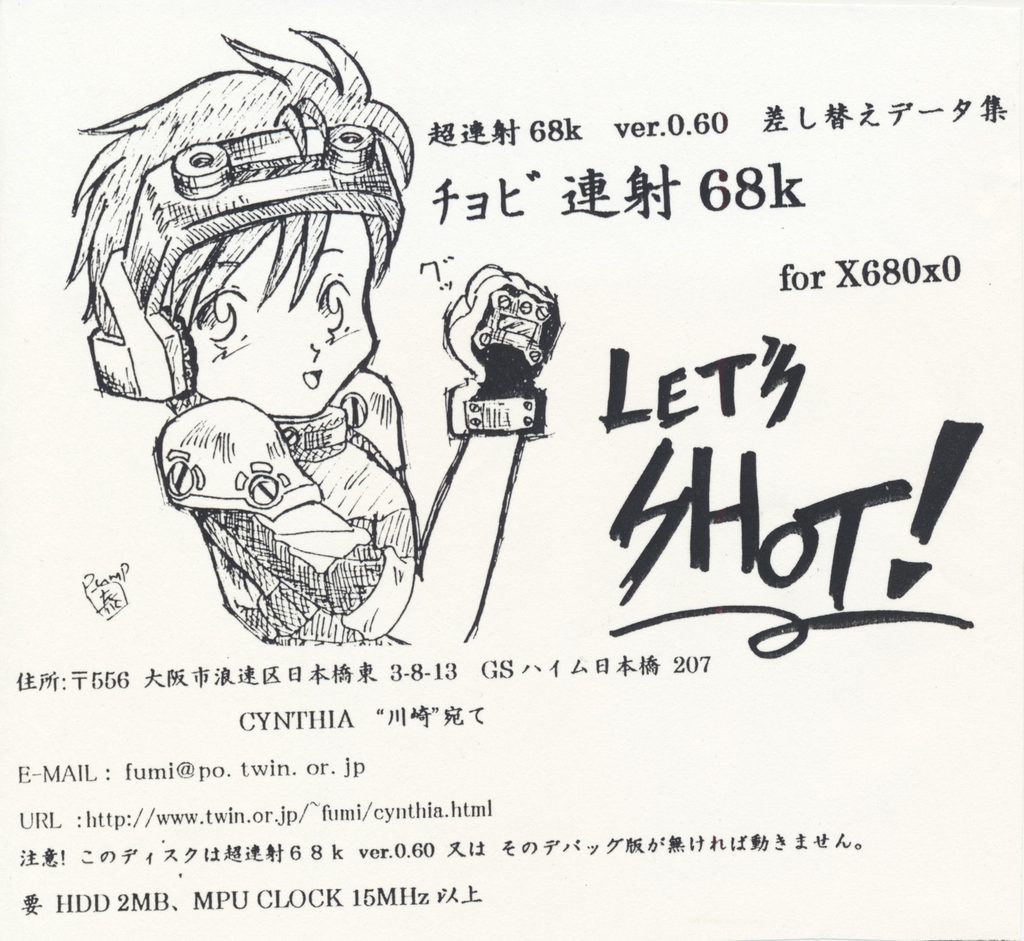
It was created by Fumi of the doujin circle CYNTHIA in 1997.

The most interesting part of this release is that it’s semi-official, in that Yosshin apparently collaborated with the doujin circle that made it, and the original composer for the Cho Ren Sha music Loser Kachigawi wrote the music for this as well (this can be confirmed by looking in the dev diaries present on the floppy).

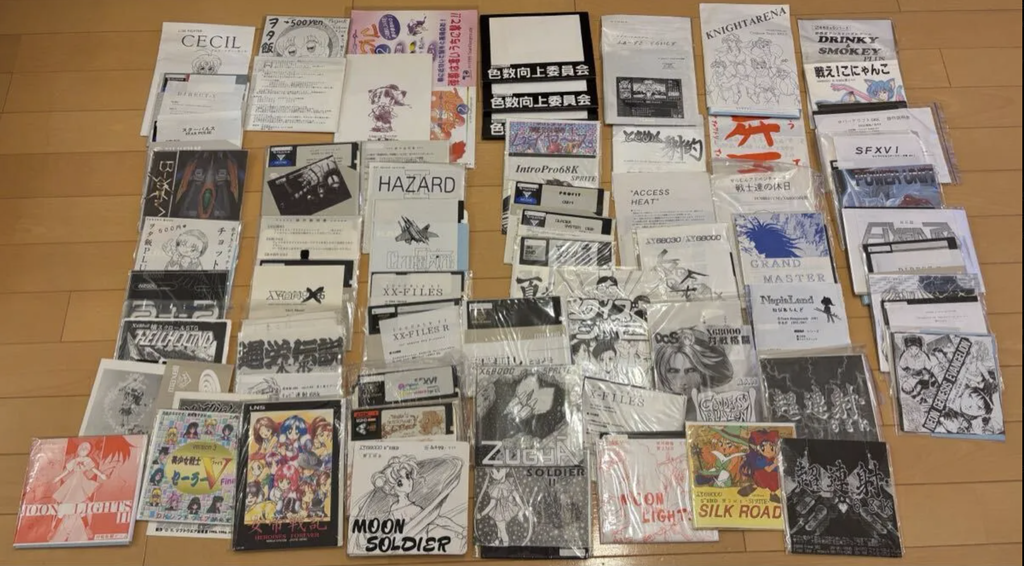
Somehow it has gone undumped until now. This is likely since I suspect not a lot of these floppies were sold, and I’ve only ever seen it up for auction twice. This one which I managed to snag, and in a huge doujin bundle a while back which went for too much money (see pic below).

The old auction I didn’t win

While this is a VERY niche release, as a big fan of CRS68k, I’ve been very curious about it, and it’s been a bit of a “grail” of mine to find.

Version differences

At least three versions of Chobi Ren Sha 68k exist. This one, which is a conversion that’s applied to an existing CRS68k 0.6 installation, a later floppy version for CRS68k 1.0, and then an even later CD-ROM release, which I believe also has a version for Windows (see discussion here).

Existing videos on Youtube like https://www.youtube.com/watch?v=MRBLrHm8ZFI seems to be from the later releases, since sprites and music has changed.

Since this early version was made before Stage 0 was added to Cho Ren Sha, there is no updated Boss sprite in the 0.6 release.

One very fun find is that the Boss 1 BGM from Chobi Ren Sha 0.6 is actually a PCM version of the TLB music that was used in the 1.0 version of Cho Ren Sha! See video below:

Examples of some sprite differences between the versions:

Stage 1 Boss in 0.6
Stage 1 Boss in 1.0
Stage 2 Boss in 0.6
Stage 2 Boss in 1.0
Stage 3 Boss in 0.6
Stage 3 Boss in 1.0

I am hoping to track down the other versions too at some point, but it’s at least nice to have one preserved dump out for this now 🙂

Gameplay

Here is a quick video of me playing through the first loop of the game.

As you can see in the video, some of the boss sprites are quite different from the release used in other Youtube videos right now.

Installation instructions

Instructions are for original X680x0 hardware. I don’t have much experience using emulators, but I assume it should be similar there.

This version of the game is really made to run with Cho Ren Sha version 0.6 (Comiket 52), but since that version is undumped, and you probably want to play a later version anyways, here’s what I did to get it running with CRS68k v1.01. That version lacks a few of the earlier PCM files, so they need to be grabbed from an earlier version.

It seems to run fine like this (see video above), but it’s possible some stuff is wrong compared to using this with CRS68k v0.6.

Requirements:

  • X68000 or X68030 with at least 15MHz cpu frequency.
    • This is apparently to handle the additional PCM, as noted in dev diaries on the floppy.
  • A HDD . This game can not run from floppies
  • Cho Ren Sha 68k v1.01
    • (Available in x68k_flop/chorensa for MAME)
  • Cho Ren Sha 68k v0.45
    • (Available in x68k_flop/chorensa for MAME)
  • The Chobi Ren Sha dump from archive.org

Steps:

  • Copy CRS68k v1.01 to a folder on your HDD
  • Copy pcm_dat/shot2.pcm and pcm_dat/fmake0d.pcm from CRS68k v0.45 to pcm_dat/ for the v1.01 install
  • Copy all Chobi Ren Sha files into the same folder as well
  • To get the TLB music to work, you need to add the lines at the code-block below this list to BGM_DAT/sz2_bgm.cnf at the top of the ボスBGM section*.
  • Run チョビるぜ!!.BAT to start. (You may want to rename this to something easier to type)
  • Enjoy!

*Stuff to add to BGM_DAT/sz2_bgm.cnf:

* True Last Boss
BGM_No.$20 : FILE = BGM_DAT¥るざりん¥SZ2_B3.MDC

I do realize that these instructions are somewhat complicated. Someone else might want to distribute a pre-patched LZH file with the contents of this at some point and/or include this in the SCSI HDD images with games that people tend to use nowadays.

Misc stuff

The only footage I’ve found of people playing this game (the later version):

Categories
Arcade Research Shmups

Cave CV1000 Video Timings

Realized I never looked at the video timings of Cave CV1000 back when I was looking at how the blitter worked, so went ahead and did that.

Results are at https://github.com/buffis/cv1k_research/tree/main/Video_Timings and they have been merged into MAME as of yesterday.

The quick summary is:

  • Pixel clock: 6.4MHz
  • Lines per frame: 262 (including sync)
  • Lines of VSYNC: 3
  • Active lines (rest is overscan): 240
  • Pixels per line: 407 (including sync)
  • Pixels of HSYNC: 29
  • Active pixels per line (rest is overscan): 320
  • Framerate: 60.0183806291 Hz (6,400,000 / (262 * 407)

For people emulating the games, this should not have any effect really. This is mostly for documenting the behavior of boards, and for people doing stuff such as custom video scalers.

Categories
Shmups

That weird Pink Sweets mobile fighting game was preserved

Saw on Discord that someone called Yuvi dumped the old Pink Sweets Japanese Mobile game, which made me happy.

I’ve known about this game for quite a long time, and the website for it is still up, but I was expecting this to just keep being lost media and never dumped.

The gameplay is pretty awkward in it, but it’s still a fun curiosity.

The dump seems to have Lace pre-leveled to a high level which makes mashing through Story mode quite trivial.

This was a good reason to finally check out Keitai World Launcher though, and there’s a lot of cool stuff there. Truly a wonderful project.

Categories
Shmups

Ibara to Ibara Black Label (Kuro) JTAG conversion

For quite a while now, I’ve known that converting Ibara PCB’s to Ibara Black Label without any soldering is possible with a minor audible difference. The character select music from Ibara Kuro is not present on the regular Ibara roms, which is not solvable without re-soldering.

Other than that, the music roms are identical, and since both the U2 and U4 roms can be reprogrammed through JTAG, that means that a conversion between them is possible, although it will be be noticable on the character select screen.

This post covers that a bit more in-depth.

Difference in music ROMs

If running the Audio_ExtractData scripts in my cv1k research repo on the Ibara and Ibara Black Label romset and then comparing checksums, it becomes clear that every entry in the list of sounds match except the first two.

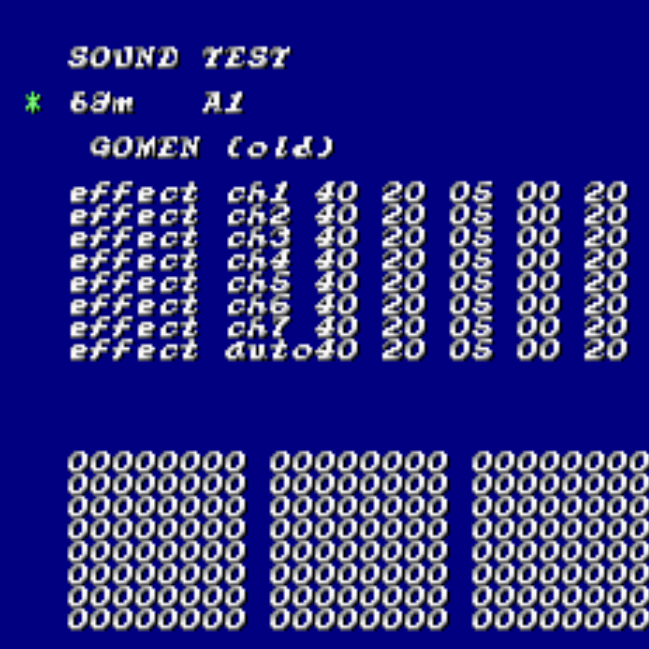
On the regular Ibara sound ROMs, this seems to be some unused placeholder music from Mushihimesama. If inspecting the name for these in the program data, there’s some strings such as “GOMEN (old)”, which can also be checked in the test menu through memory hacking. Playing these will play some of the Mushihimesama music.

The track at ID=0 is just about a second, but the one at ID=1 is about 28 seconds long.

If inspecting the music in the first two slots of Ibara Kuro, then one can notice that the first one holds the new Character Select music, which is the only new tune (about 47 seconds long).

This means that simply swapping the non-music roms on the board would have the character select music play a second of Mushihimesama music, and then silence… which isn’t the end of the world, but we can improve that slightly!

Modifying the Ibara Kuro U4 rom to play nice with character select music

The simplest thing to do here is to swap the track played on character select screen. After reverse engineering the program code, the TL;DR is that this is controlled by the byte at offset 0xC186F of the Ibara Kuro U4.

By default it’s set to 0x00 which would play a second of Mushihimesama music. Changing it to 0x01 will have it play the longer Mushi tune, which I felt was sufficient. Changing it to 0x10 will have it play “Showtime” which was the original Stage 1 music that was not used in Ibara Kuro for some reason, so that’s also a good option.

TL;DR: Change the byte at 0xC186F from 0x00 to 0x01.

Writing ROMs through JTAG

The TL;DR here is really just to follow the instructions on https://github.com/buffis/cv1k_research/tree/main/JTAG (and especially https://github.com/buffis/cv1k_research/blob/main/JTAG/urjtag_setup.md )

Commands below assumes having checked out that repo and using a UsbBlaster, but if you go the Tigard route, it will be a lot faster.

Either way, it will take a long time (24h or so for Tigard, several days for UsbBlaster), so make sure to have a good space to do it!

Writing U4

First be nice and dump your own U4 and verify it’s not a undumped revision.

sudo jtag
jtag> cable UsbBlaster
jtag> detect
jtag> detectflash 0
jtag> readmem 0 0x200000 u4.bin

Then with the U4 modified for the character select screen:

# This will take a few hours with UsbBlaster, and less than
# an hour with Tigard
sudo jtag
jtag> cable UsbBlaster
jtag> detect
jtag> detectflash 0
jtag> flashmem 0 u4.bin

Writing U2

It’s VERY VERY IMPORTANT to make a backup of the initial block of your PCB first. CV1000 programs around initial bad blocks of the NAND, and if you lose your bad block table, than that can lead to bad behavior later.

# Store this somewhere safe
sudo python3 K9F1G08U0M_JTAG.py read_page --page=0 --filename=u2_page0.dump

# Then run this to print the bad blocks
sudo python3 K9F1G08U0M_JTAG.py bad_blocks

You will then need to align the Ibara Kuro U2 rom to the bad blocks, using: https://github.com/buffis/cv1k_research/blob/main/U2_Tool/u2tool.py

As an example, if blocks 78 and 201 are bad, run:

python3 u2tool.py adjust ibarablk.u2 --outfile=ibarablk_fixed.u2 --bad_blocks=78,201

You can then follow the instructions of https://github.com/buffis/cv1k_research/tree/main/JTAG#write-u2 to write this to the board. With a UsbBlaster, this can take 70+ hours. With a Tigard, I think it’s closer to 24 hours, so still a while.

Should you do this?

Honestly, probably not. The base game plays better, and Black Label feels a bit like a weird romhack. Unless you are confident messing around with expensive hardware, I’d avoid doing it. The setup is somewhat complex.

If you however end up doing it, make extra sure to backup your bad block table and don’t complain to me if you break something.

But yeah, if you have several Ibara boards and you know what you are doing, then this can be fun to do on one of them since you can always reverse it later 🙂

Categories
Old Hardware Shmups

Psikyo Multi

Sometimes you just wanna flex your dank new hardware.

I managed to grab a Psikyo SH2 Multi from aje_fr after waiting in line on the arcade projects forum. It is kindof amazing.

Supports the following games:

  • Sol Divide – The Sword Of Darkness
  • Strikers 1945 II
  • The Fallen Angels
  • Space Bomber
  • Gunbird 2
  • Strikers 1945 III
  • Dragon Blaze
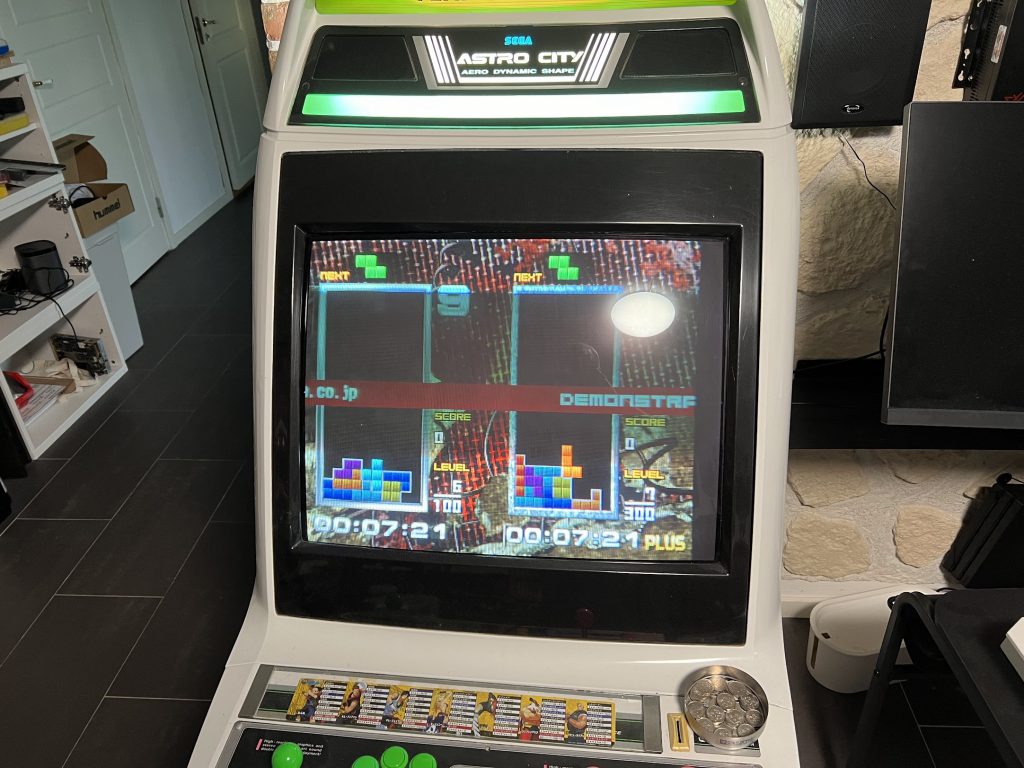
  • Tetris: The Absolute – The Grand Master 2
  • Tetris: The Absolute – The Grand Master 2 Plus
  • Gunbarich
  • Mahjong G-Taste

… which is really nice, because I own most of the early Psikyo games, but on this hardware I only had the original PCBs for Strikers II, Gunbird 2 and G-Taste (best jong game).

Went ahead and converted my Strikers II which was… not too bad! Clearing the holes for the adapters of the sub-pcb was a bit of work, but with a good desoldering station it was fine.

With an inspection microscope, the rest of the install was pretty simple.

Time to play Tetris and Space Bomber!

Categories
Shmups

Cave 1CC difficulty list

Some Cave game difficulty rankings have been going around the Twitterverse recently, so thought I’d post my opinions and list, with some motivations behind the entries.

This is how I’d rank the difficulty of most Cave games in one credit. Videos of me clearing them are attached for all titles.

  • This does not cover the more difficult modes of the games, so no Mushi Ultra, SDOJ EX or similar.
  • This is for 1-ALL for multi-loop games
  • Entries are grouped into five difficulty groups.
  • Entires within groups are pretty similar in difficulty, but somewhat ordered by hardest (top) to easiest (bottom). This is much more vague than the overall grouping though, since the difficulty will be similar-ish.
  • Some comments why they are placed where they are is attached

“The List”

T1 (Harder)

  • Dangun Feveron (B-Roll or C-Roll)
    Very hectic game that’s easy to mess up in. Don’t go for TLB, and time out last boss (it takes a while). Still hard.
  • Dodonpachi Saidaioujou (A-Shot)
    Overall high difficulty. Last stage is really hard, and its best to try and save bombs for it. Ideally no-miss to S4 midboss extend, which requires pretty strict routing.
  • Ketsui (Type A)
    You get a lot of extends and bombs in this, but even considering this, a lot of routing is needed for the last three stages. The bosses are quite hard. The lock-on system rewards quick lock ons for survival which means strict routing.

T2 (Hard)

  • Ibara (Bond Type C)
    The harder bosses can be skipped by saving up Hadou charges, but you still need to deal with the last two stages, which are hard unless you manage the rank . This means intentionally dieing a lot, and correctly. Requires a good amount of routing, and Garregga-esque rank management.
  • Dodonpachi Saidaioujou Exa Label (D-Shot)
    Overall easier than regular SDOJ if keeping rank low, but still hard. Some boss/midboss patterns are significantly easier.
  • Guwange (Any character, Gensuke is easiest)
    Most of the difficulty comes after full life refill in last stage. Getting to it requires some work, but is easier than the rest of the game. Later part of last stage is hard to no-miss, and you want to have some resources for last boss. Final boss pattern is real random and can mess you up unless you have some life to tank it.
  • Guwange Blue Label (Any character, Gensuke is easiest)
    Overall easier stages due to bullet slowdown on Shikigami, but some patterns are harder (especially phase 1 of final boss). About the same difficulty to clear.
  • ESP Ra.De. (Yusuke or J.B.)
    Last two stages require good routing. S4 boss is a little hard. Final boss has a lot of phases and is tricky.

T3 (Medium)

  • Ibara Kuro (Dio Type D)
    No need to control rank like in regular Ibara. Some easy graze safespots for setting up score for extends. Still need to deal with stage parts of last two stages, but still an easier clear than vanilla.
  • Mushihimesama Futari 1.0 Original (N Palm)
    Plays similar to 1.5, but Ab Palm is garbage, and N Palm is a better option. S4 boss has a pattern with broken safespots that needs bombing. Last boss is also harder. Overall a much harder clear.
  • Akai Katana Exa Label (Type C)
    If keeping rank low, the patterns aren’t too bad. Just like in Shin, you can’t just reflect bullets on hard patterns, so you need to learn them, and bomb the trickier parts. Type C’s Spirit attack is extremely powerful and can melt hard boss phases like S6 boss phase 2.
  • Akai Katana Slash/Shin (Type B)
    Much harder than regular Akai Katana, due to Spirit form not reflecting bullets, and additional stage. Still not too bad. Worst patterns can be bombed, and the sword attack does good damage. Type B is real strong in this.
  • Progear no Arashi (Bolt + Nail)
    Recommend going for 11M extend. That gives a good amount of resources, which helps with the clear. Not much to say otherwise. Medium difficulty patterns, where the hardest can be bombs.
  • Espgaluda 2 (Asagi survival route)
    Tateha/Ageha is very hard, but Asagi can “cheat” due to her Kakusei being so strong. Save gems for bosses, then just melt them. Allows basically skipping last boss. Still needs routing and resource control though.
  • Muchi Muchi Pork (Any character, but Rafute is easiest)
    Some hard patterns, but you get 10+ lives pretty easily, and the bomb is strong, and can be used often. This allows for many mistakes while still clearing.
  • Pink Sweets (Kasumi B, inifinite lives glitch)
    Without infinite lives, this game is extremely hard. Setting up infinite lives require strict routing and careful play, especially on S3 midboss. I’d argue its similar in difficulty to many other clears.
  • Dodonpachi DOJ Tamashii (B-L)
    Basically same as BL. Maybe a little harder, but not much.
  • Dodonpachi DOJ Black Label (B-L)
    Needs some routing, but you get enough resources in terms of hyper and bombs to skip a lot of the harder parts. Some early game scoring is sufficient to hit all score extends.

T4 (Easy)

  • Dodonpachi (C-L)
    Just bomb when things are scary.
  • Donpachi (Type C)
    You get so many bombs, and are encouraged to use them due to the end of stage recharges. Some bosses have easy safespots.
  • Espgaluda (Ageha)  
    Very easy except for last boss, which is hard. Practice that a lot.
  • Mushihimesama Futari 1.5 Original (Ab Palm)  
    Very straightforward game. Ab Palm is real strong, not much to say here.
  • Mushihimesama Futari Black Label Original (Reco)  
    A little easier than 1.5 probably, but basically same thing.
  • Dodonpachi 2 – Bee Storm (Without triggering TLB)  
    Keep score low enough to not trigger TLB. Most boss patterns are 100% static so learn the safespots. Abuse energy recharge glitch.
  • Mushihimesama Original  
    Recommend using S-power for the good speed. Fast sparse patterns that aren’t too hard.

T5 (Very Easy)

  • Akai Katana Climax/Zetsu (Type C)
    Similar to regular Akai Katana but one extra stage, thats not very hard. Energy recharge glitch doesnt work, but doesn’t make things much harder.
  • Akai Katana (Type C)
    Spirit form + energy rechage means skipping all hard patterns are possible. All the slowdown also helps. Type C just melts things in spirit form.
  • Deathsmiles (Rosa)
    Learn a simple route for first stages. Use hyper and don’t bomb Jitterbug to get the 2-up, which means you can just bombspam last boss. Silly.
  • Dodonpachi DFK 1.5 (Strong C)
    You can just autobomb through this basically. So many bombs.
  • Deathsmiles 2 (Casper)
    Easy patterns. Easy clear. Bad game.
Categories
Shmups

New game pickup

Picked up a Batsugun PCB, as partial trade for my Ibara Kuro. Looking forward to trying this out. My cab is currently in horizontal mode, so will have to rotate it first though. Might play some more horisontal games for now first.

Categories
Shmups

Goodbye Ibara Kuro

One of my goals for this year is to sell games for more money then I spend, which means getting rid of some of the pricier items I own. This includes my Ibara Kuro PCB that I bought last year. This has gotten so expensive now that it’s hard to motivate keeping it, and I’ve finally sold it and shipped it away to its new owner today.

Ibara Kuro in my cab.

Ibara Black Label (also known as Ibara Kuro) is a remake of Ibara that plays nothing like the original game. Instead of playing like a typical Yagawa shmup, you have a dynamic rank system which increases with medal pickups, and resets on bombs and big cancels. In addition, there’s a multiplier that increments when grazing enemy bullets, which is not a system you’d typically see in Cave games.

Since the PCB is very rare and there’s so far no ports of this game on any non-arcade platform, the price of a PCB has shot up by a lot. While it’s a cool and unique game, I don’t think I’ll play it too much more (I prefer regular Ibara), and I’d rather spend that money elsewhere.

Ibara Kuro PCB

1CC Video and basic strategy

Ibara Black Label 1CC

For character selection, I like Bond Type D for his speed and bomb. I’m not sure how much of a difference it makes in practice.

Stage 1: My execution of the initial scoring is pretty flawed, but start by setting up a Hadou Gun, and build a medal chain to increase your rank. Then later on, move to the top left corner and graze the big stream of bullets, to build a big counter for a cancel, to get some points towards an extend. There’s another nice stream of bullets you can setup later on as well (watch the video). No specific strats for the boss. Don’t be afraid to bomb. No missing this stage shouldn’t be a huge problem

Stage 2: I tend to use 5 Way for most sections with small enemies, and rockets for the larger ones. I don’t do any impressive scoring at all on this stage, but just focus on keeping the medal chain alive. The trickiest section to route is the part before the two flame towers. I recommend just replicating the video for that.
On the boss, start by staying above the first phase and taking it out that way, similar to regular Ibara. For phase two, follow a Hadou Gun up the right side of the screen to build rank from medals, and then park yourself in the safe spot right below the health bar. This will allow milking a lot of points towards an extend.

Stage 3: Rockets feel quite strong here. Try to keep medal chain going and start getting a lot of bombs. I’ll use a hadou gun or two towards the later trains, but like to reach the boss with full bomb meter. For the boss, I’ll hadou it once when it gets to unmanageable, and that should be enough.

Stage 4: For the extend ship, I start by damaging it’s right side with a hadou gun activation that I fire on the left side. Then I can sit and safe spot it above the right bullets while building multiplier for some free points towards extend. 5 Way is very strong in this stage, and should basically be used at all times until the big end ships which Napalm work better against. Try to be at max bombs for the boss.
The boss itself is pretty easy in phase 1, but will likely require a hadou gun for it’s second phase which has very dense patterns.

Stage 5: For the first section, small movements with rockets are kep. You can use the same trick with double hadou guns to get full bomb pickups from the tanks as in big Ibara. Just place them in a way so that they’ll destroy both sides of the tanks tracks, without hitting the tanks themselves. 5 Way is very strong at the later parts of the stage since there’s so many small enemies.
For the boss, I quick kill phase 1 by placing a hadou gun shot at the edge of it’s sprites. It then has some pretty silly safe spots for phase 2, which trivializes that part of the fight (see video). You can milk this quite a bit if you want. The last phase is total bullshit and will need two hadou gun shots.

Stage 6: 5 Way is once again very strong. I trigger a pretty late third extend here in my video. Ideally I’d have it earlier, but three extends is what I’d typically end up with on my route.
For the boss, I just rely on my hadou gun shots for anything that looks scary. In my clear, I get really really awkward hadou gun shots, since hitting the enemies that the boss spawns will do very little damage. This causes me to have to do some pretty silly dodges. If you can instead tag the boss in its last phase with two of them, it should be enough.

Categories
Shmups

Pink Sweets 1CC and Infinite lives tutorial

Pink Sweets is easily one of Caves hardest games, but on PCB there’s an infinite lives glitch that can be triggered, which trivializes the rest of the game.

This requires getting 4 extends without dieing, which is not much easier than a typical Cave 1CC. I got this a while ago, but finally took the time to record a quick commentary on how to trigger the glitch, if others are curious.

Extends spawn when you destroy 2500 enemies or destructible bullets, and then kill an enemy. This means you want to try to destroy as many destructible bullets as possible, especially on midbosses and bosses. This requires pretty careful planning.

Pink Sweets Infinite Lives Guide

On a good Stage 1 run, you should be able to get the zan counter to about 2000, triggering the first extend early on stage 2. If you trigger the first extend later in Stage 2, that’s not a huge problem since you can make up some on the Stage 2 boss, where I don’t care much about going for zan in this run.

S3 midboss is the make or break section of the run, since it’s very easy to mess it up, and it will sometimes give you random movements which makes it hard to trigger the deaths of side capsules when you want it.

For MAME practice, you can use the following lua script, to display the zan counter when playing, which simplifies routing. This will obviously not be helpful when playing for real on a PCB later as in the video above.

// Put this in pinkswts.lua
cpu = manager:machine().devices[":maincpu"]
mem = cpu.spaces["program"]
s = manager:machine().screens[":screen"]

function draw_hud()
 cnt = string.format("CNT : %d", mem:read_i16(0x0c4a3ab6));
 s:draw_text(225, 3, cnt);
end
emu.register_frame_done(draw_hud, "frame")

// And run game with mame64.exe pinkswts -autoboot_script pinkswts.lua

For completitions sake, here is my full 1CC using the glitch, but the rest of the run isn’t very exciting.

Pink Sweets 1CC (PCB)

The game itself is pretty interesting. It plays sortof like Yagawa’s earlier games, but is much less forgiving, and rank control isn’t as doable since you no longer get point extends.

Going for a non-infinite lives 1CC is very hard, and seems easiest by completely skipping item pickups and playing very carefully. It seems unlikely that I’ll get back to doing that, since this isn’t really one of my favorite games.

Stuff from the collection

Pink Sweets PCB
360 port. No infinite lives glitch on it, and not a great port. Arrange mode is fun though.
Categories
Shmups

Battle Garegga 1CC

After a few weeks of trying, I managed to get 1CC in Battle Garegga with Golden Bat on both the PS4 port and the original PCB this week.

Battle Garegga 1CC (Golden Bat) on PCB, October 2020
Battle Garegga 1CC (Golden Bat) on PS4, October 2020

Definitely a game that lives up to the hype. It’s also a game with a lot of stuff going on, so not going to try and write up any real strategies for it (just read about it on the shmups wiki). Rank management is extremely important for setting up the last few stages to be reasonably hard.

My Garegga PCB

Since I did write down my overall route, I’m pasting it below though, hoping that it might be useful. Otherwise I’d just watch the videos. I feel like this route is a pretty good approach to a survival 1CC.

My Golden Bat 1CC route for Golden Bat

Overall stuff:
While this is a survival run, it aims to hit the 7M extend (and can hit 8M). You want to do some scoring in Garegga to get more extends to lower your rank.
If you drop the medal chain before S4, reset the game.
I always mess up at least a few things in my runs, but this can be seen as the general goals I have.

Stage 1:
– Get two options.
– Die to boss once to reduce rank..
– End stage at 0.3-0.4M, 1 Life, rank at around 1-2%

Stage 2:
– Should be at about 1.5M after birds.
– For the big thank, count seven waves of red planes and then follow it down along the screen to pointblank it.
– Try to avoid activating “search hidden formation” which increases frame rank. This might mean not shooting some of the last enemies.
– Die to boss and go on top of it to quick-kill with a bomb.
– End stage at about 2M, 2 Life, rank at around: 1-2%

Stage 3:
-Bomb the initial rails and silos for big medal points.
-Afterwards, try to not pickup any bomb fragments.
– Die once before 3M (you should be at one spare lives afterwards).
– Get the hidden extend (reset the game if you don’t).
– End stage at about 3M, 3 Life, rank at around: 2-3%

Stage 4:
– Avoid bomb fragments unless you need them for destroying stuff.
– Bomb the small pipes before the orange tank, and all tank silos at the start of the stage.
– On orange tanks, start from the right tank, then move left (bombing the silos) and finally take the second right tank.
– Intentionally die to the four green tanks to do damage to their threads. Try to pick up 2-3 big bomb fragments.
– Leave five bomb fragments before the boss to setup homing formation.
– Die down to 1 spare lives before the 4M extend.
– End stage at about 3.8M, 1L, about 3 Bombs, Homing formation, rank at around: 2%

Stage 5:
– Avoid hitting max bombs since it increases rank.
– Power up to 4 options, max power.
– On Mad Ball, if run is going well it might make sense to not die and just bomb it. If you feel like your rank is too high, die to it and bomb it similar to on Stage 2.
– Start slayer at about 5M, 2L, 4-5% rank (or 3L, 8-9% rank if not dieing to Mad Ball).
– Leave five bomb fragments at end of slayer to setup for Homing formation at start of S6.
– Start Blackheart at about 5.5M, 2-3L, 7-11% rank and try to not die 🙂

Stage 6:
– Power up to max if you aren’t already. Raise autofire to 15hz. Get homing formation.
– Ignore medals (chaining them here are hard).
– Use one bomb on turret wall.
– Reach boss at 6M+, 3L, max power, homing, 3-4 bombs, about 25% rank.
– Bomb both phase 1 and 2.
– End at: 6.5M, 3L, 27-30% rank.

Stage 7:
– Blackheart 2 at 6.5M, 3L, 30% rank, some bombs.
– Die once probably. End at around 7M. Only use bombs on the pattern where he goes downwards if you need more score to hit the 7M extend due to messing up earlier.
– Reach Glow Squid at 30-35% rank, 3L.