This web page is a part of buffi's web ring
Categories
Old Hardware Retro Computers

Fun with CZ-6EB1 : Sharp I/O Expansion Box 

Have been looking for one of these for a while, and finally managed to buy one for a mostly OK price. Here is a writeup on these things since there’s not that much available online.

High level features

CZ-6EB1 expands a two-slot X68000 into a four-slot computer, by plugging in an expansion card into the X68000 which routes two flat cables to a breakout box containing four IO slots. This likely works similar to how it’s done in a X68000 Pro.

This box has a separate PSU for the four cards, since powering the cards over the flat cable would not be feasible. This PSU will only power the card when power from the host machine is detected, otherwise the device stands in “standby” mode.

I bought a photocopied manual for these in a separate auction, which I’ve scanned and made available here.

Internals
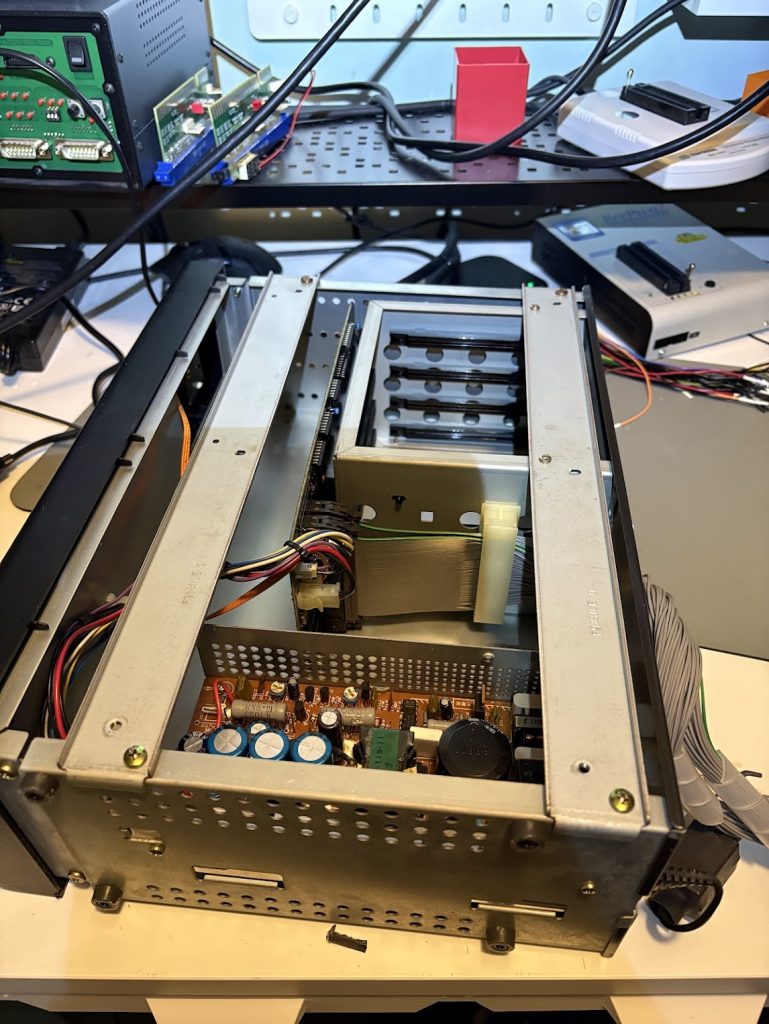
The IO breakout board which plus into the host machine has only two connectors wired to the edge connectors. There’s no other circuitry on these.

These plug into the main board of the CZ-6EB1, which is called K5414DE. This board has a section near the flat-cable connectors which seems responsible for switching the power to the I/O cards on/off. There are two CK2605 PLD’s at IC1 and IC2, which I should probe with a logic analyzer and dump at some point.

I suspect the IC2 is responsible for the power management, while IC1 handles IRQ/ACK signals across the four slots somehow similar to how it works on the X68000 Pro.

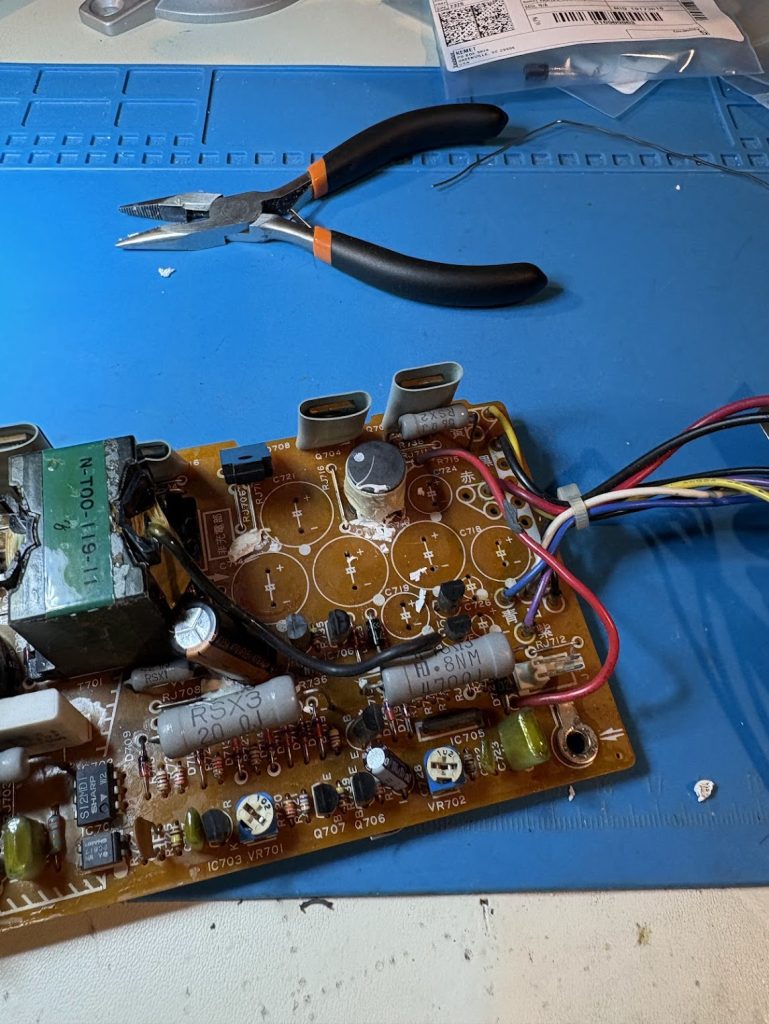
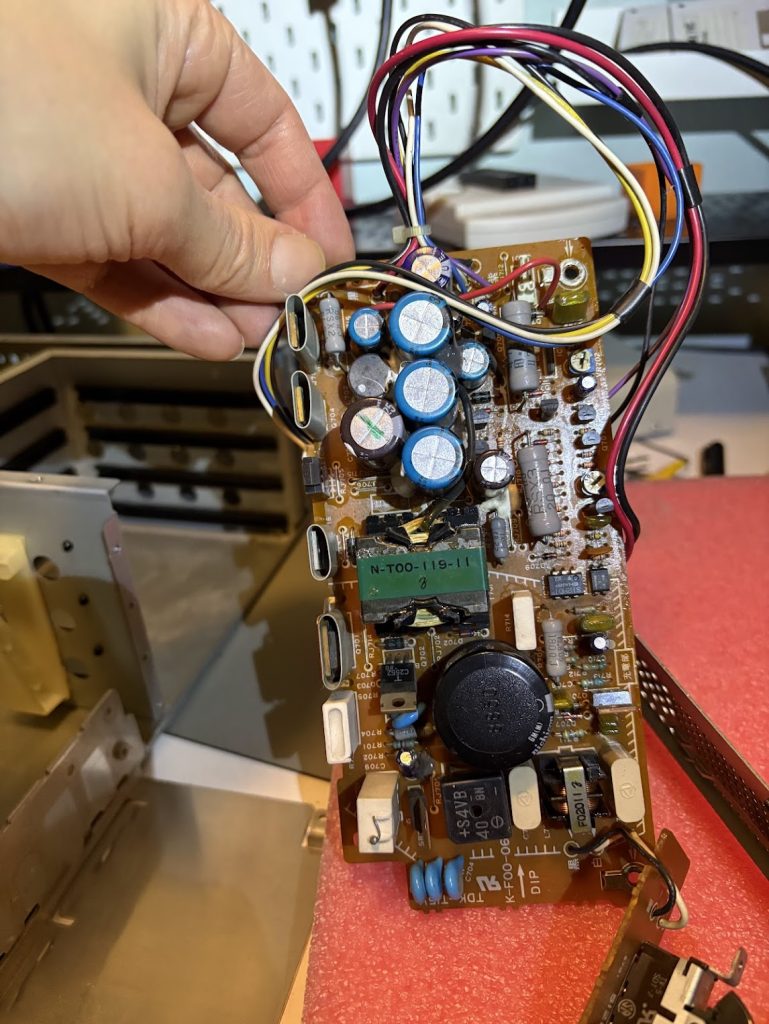
There’s nothing particularly interesting about the PSU. There’s quite a lot of glue on some of the caps which makes recapping awkward but doable.
Recapping / cap-list

I decided to recap this thing, and found some sketchy looking caps which had started to leak so that was a good idea. The full cap-list is below. Something mostly similar in size will work, since there’s a lot of space available.

PSU

CapCapacitanceVoltageDia x H (mm)
C706330uF200V30×26 (snap-in)
C70922uF25V5×11
C7104.7uF50V5×11
C7143300uF10V16×30
C7153300uF10V16×30
C7163300uF10V16×30
C7182200uF6.3V13×20
C719470uF16V10×20
C7204.7uF6.3V5×11
C7212700uF25V16×30
C724470uF16V10×20
C725470uF35V10×30
C72622uF25V5×11
C728100uF10V5×11

Main board

CapCapacitanceVoltageDia x H (mm)
C1100uF10V5×10
C2100uF10V5×10
C347uF16V5×10
C447uF16V5×10
C510uF16V5×10
C610uF16V5×10
No cap

Hooking things up

Getting things working on a regular 10Mhz X68000 is quite simple.

  • Plug the card into Slot 2 of the X68000 and mount the back cover
  • Connect the FG terminals on the X68000 to the CZ-6EB1
  • Insert expansion cards into CZ-6EB1
  • Power on the CZ-6EB1. It should have a red LED indicating standby
  • Power on the X68000, the CZ-6EB1 will wake up as well.

RAM incompatibilities

When connected to a CZ-600, I could plug either a XSIMM10 or a Etarikashikoshi into the expansion unit, and have them be detected and work properly when running Memtest. Using a Nereid as RAM expansion did however NOT work, and kept giving me memtest errors. It works fine without the expansion box, so something was weird there.

With a X68030, I was unable to get any RAM card to work through the expansion box. The memory gets detected, but memtest shows failures, and games will not run well.

The manual only states that CZ-600 (10Mhz) is supported, and I could definitely see the higher clock rate causing these issues somehow.

Using other I/O cards like MIDI did work with this when connected to a X68030, but since the manual states that the internal Slot 1 cannot be used when the CZ-600 is hooked up, this limits the system to the internal 4MB RAM. Maybe that can be worked around somehow. Not sure.

Should you buy one / Other options?

Buying one of these is only really worth it for the “cool factor”, since it looks awesome next to a X68000. It being limited to 10Mhz for RAM means that the more sane option for having four slots is just to buy a X68000 Pro, which will cost less than just the expansion box.

Another four slot option is “Xpander IV” which extends the XVI Model with an internal four slot expansion. This looks real cool, but was not an official product and seems extremely rare. See: https://akiba-pc.watch.impress.co.jp/docs/wakiba/find/745817.html

Potential future projects

I haven’t seen any real documentation on how the conversion from two to four slots actually works. There’s a japanese blogpost which shows a DIY option, and references “Monthly I/O October 1991” as having some information. That would be nice to track down. Otherwise I might just see if I can reverse engineer how this thing (or the X68000 Pro board) works.

I am also curious if it would be possible to use this, while having RAM connected to the internal Slot 1 of a X68030, and that way bypassing the RAM issues. The manual does explicitly state to not use that port when the IO box is in use, so this is unlikely to be a good idea. Additionally, physically fitting a card in there is tricky when the IO-box extension is in place.

Categories
Old Hardware Retro Computers

X68030 SCSI Adventure Part 5

This is just a small follow-up to the earlier posts, but I noticed that my Henkan Banchou was running real slow on my X68030 for some reason, so I tried swapping it for a old BlueSCSI V1 and that works much better.

I assume V2 would be the same, but this was all I had at home.

Some people seem to swear by Henkan Banchou, but it just wasn’t playing nice for me. As a fun thing, I’m trying out one of those Micro-SD card extenders now too, and routed that out the back of the unit. Makes it easy to swap cards, but realistically I don’t think I’ll do that much.

I’ll keep it like this for a bit and will then just use a regular Micro-SD card.

Categories
Old Hardware Retro Computers

X68030 SCSI Adventure Part 4

For context, I recommend reading part 2 first.

Given what I learned from the first iteration, I made some changes and now have an internal SCSI adapter for X68030 that I’m happy with.

Available on github.

Now HDLED is supported as well without any extra circuitry. Just run a wire to the SCSI-SD Adapter.

Quick video showing the HDLED working:

I am quite happy with this now, so I don’t expect further updates on this project.

Categories
Old Hardware Retro Computers

X68030 SCSI Adventure Part 3

Well… I figured out what the SCSI ID switch on the back of X68030 does, and uuuuuh.

I was a bit confused what the idea of that was, since there’s a SCSI_ID setting in SWITCH.X already which seems to select the SCSI ID of the computer.

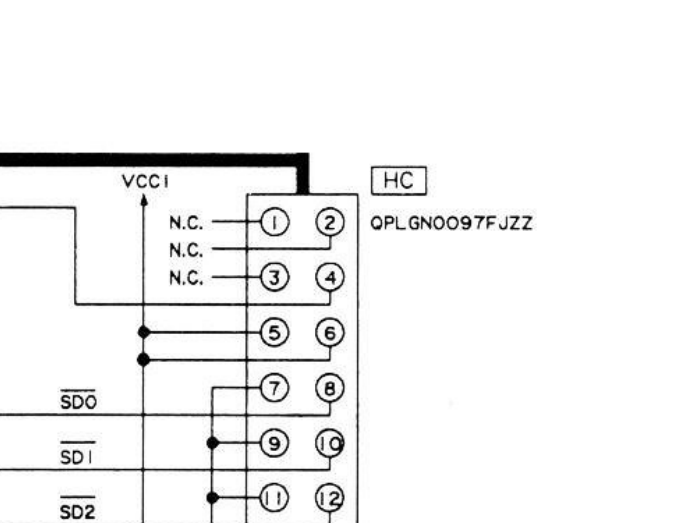
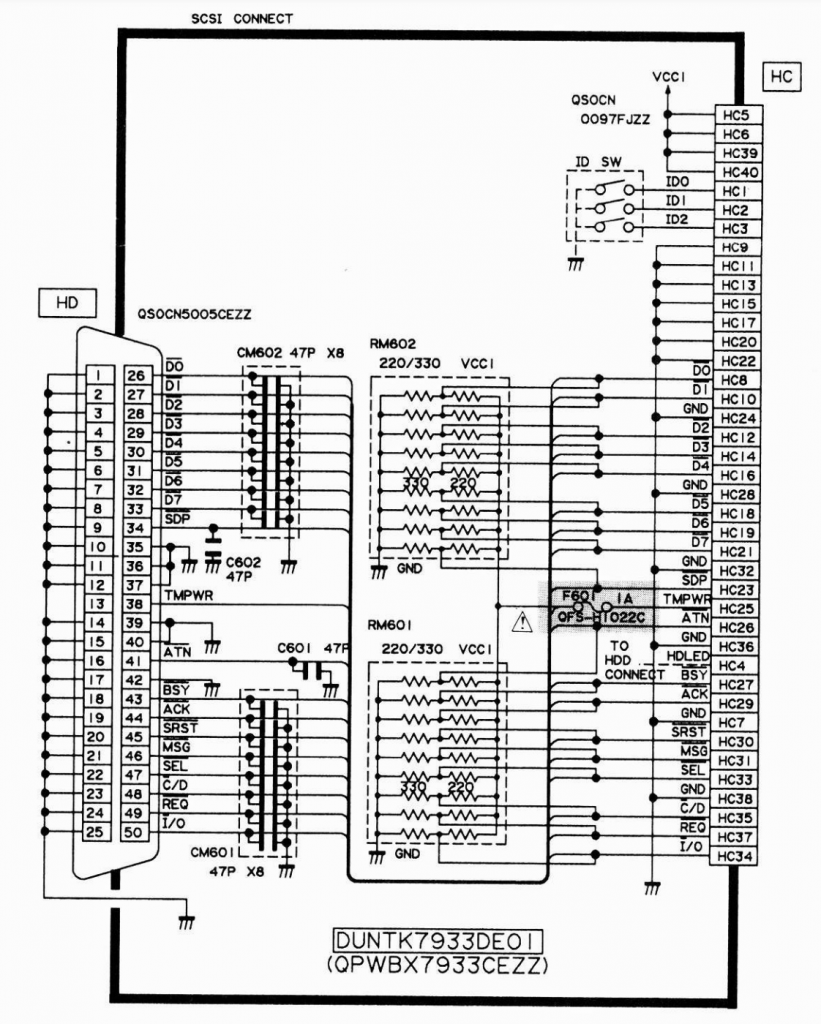
So here’s the relevant part of the schematic of the SCSI IO board.

So it’s connected to pin 1-3 on the HC connector… what does that map to on the motherboard?

Absolutely nothing apparently. Pretty weird. Turns out the switch is just chilling there, not hooked up to anything then.

Categories
Old Hardware Retro Computers

X68030 SCSI Adventure Part 2

Since I wanted to be able to have a SCSI to Flash adapter connected internally to my device, I had to make some adjustments to the hardware.

Hardware

I wanted to hook up an internal SCSI HDD to my X68030, and decided that instead of trying to manufacture a cable for this, I’d just make a quick replacement SCSI IO board with the proper connector. This board has the same configuration of resistors and capacitors as the original board, but lacks the external connector. It has headers for setting the SCSI ID, but it’s fine to leave this unpopulated and just use SCSI ID=0 for the X68030.

SCSI Device setup

Setup is quite minimal.

There shouldn’t really be any settings needed to be changed in SWITCH.X. Leaving device boot as STD works, and either 0 or 7 as SCSI_ID works fine.

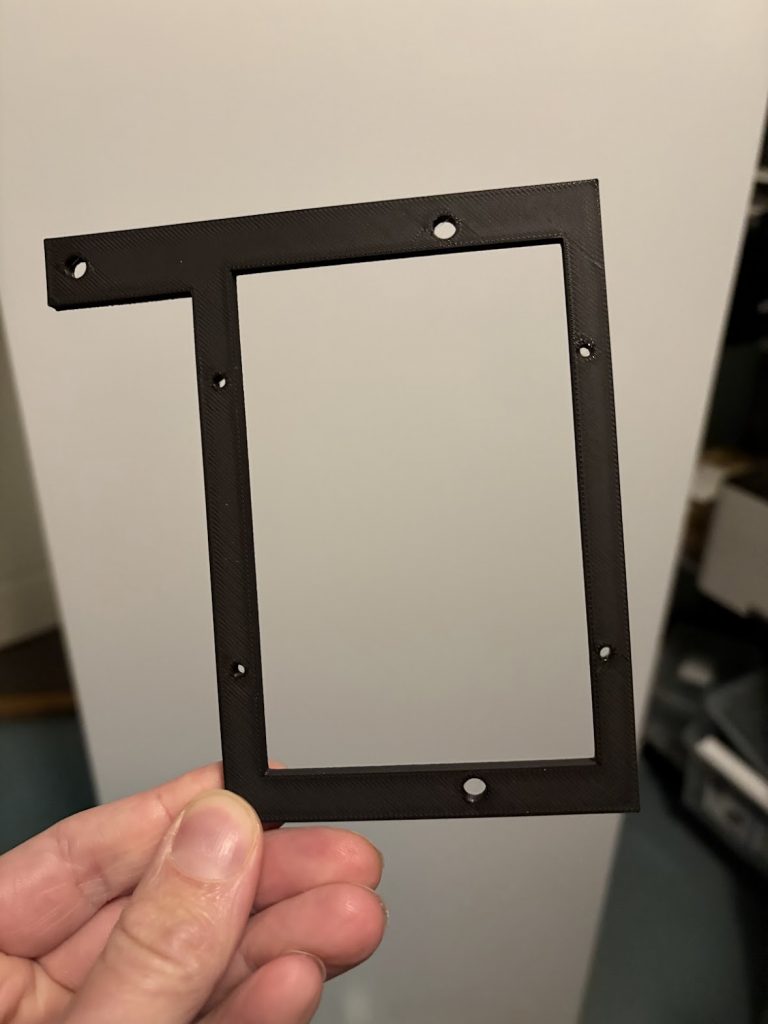
I had a spare Henkan Banchou 変換番長 Pro from a previous project that I decided to use. I designed and 3D printed a bracket (STL is at end of this post) for this to fit in the top right of the X68030, since that’s where the internal HDD is in CZ-510C.

I loaded this with the SxSI-SCSI HDD Image v3.01 from NFG Games forum, and things pretty much just worked right away, once I connected the cable.

Power is supplied using the flat cable (as long as the connected device doesn’t require more than 1A).

Downloads

Internal SCSI board

KiCad project and Gerbers for this can be found at https://github.com/buffis/x68030_scsi_adapter. This also has the BOM.

There’s minor layout changes to the one in pictures above, but no change in functionality.

Henkan Banchou mounting bracket

Also available on Github under https://github.com/buffis/x68030_scsi_adapter/tree/main/mounting_bracket.

Standard STL file that any 3D printer should be able to print.

Categories
Old Hardware Retro Computers

X68030 SCSI Adventure Part 1

I finally got SCSI working on my X68030 CZ-500C, so thought I’d do a writeup on what I learned. It will be in two parts, where the first one covers the default CZ-500C SCSI support, and the second part covers a new adapter I made for using internal SCSI devices.

CZ-500C SCSI Internals

X68030 has proper SCSI support, not just SASI as some of the earlier X68000 models. CZ-500C does however lack cabling for internal SCSI HDD (which CZ-510C has). The internal connector used from the main board to the SCSI IO board is a non-standard 40-pin flat cable. The schematic for CZ-500C including the SCSI board can be found here.

The IO board itself is quite simple. Other than the connectors and ID switch, it just has a terminating 33oΩ/220Ω resistor network, a bunch of capacitors and a 1A fuse for the external power delivery. It is mounted on top of another IO board for the external floppy, and easy to remove with two screws.

If the SCSI board is not connected to the bottom PCB of the X68030, the system will not start.

External connectors

The external SCSI connector is a “Micro Centronics” connector, which is hard to find proper cabling for. It seems like the Japanese term for these are アンフェノールハーフ50 (Amphenol half 50) or アンフェノールハーフピッチ50 (Amphenol half pitch 50).

When looking for adapters to full-size Centronics, you can search for that in combination with アンフェノールフル 50 (Amphenol full 50), and look for a cable with a male Micro connector that goes to a female full size connector. This can then be hooked up to a Centronics Bluescsi device. Example from an Mercari auction:

There is a SCSI ID switch on the back of the unit. This doesn’t seem to be related to the external device, but rather the SCSI ID that the X68030 uses. Weirdly there’s also an option for this in SWITCH.X so I’m not really sure which option has priority. The compact version of X68030 does not have this switch, nor does other X68000 models as far as I can tell.